
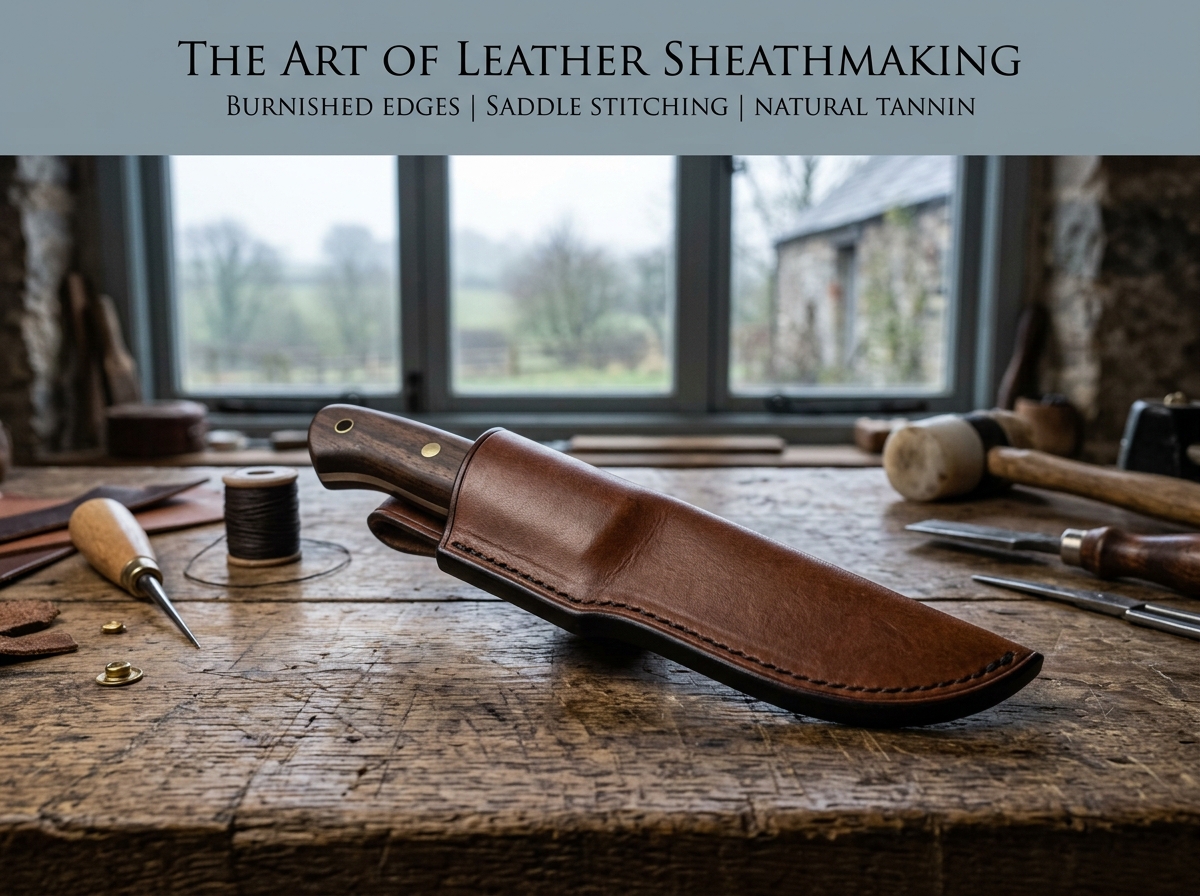
Learning how to make a leather knife sheath is one of the most rewarding and foundational skills for any woodsman, ranch hand, or aspiring leatherworker. Let’s be honest: carrying a razor-sharp fixed blade bare or stuffed into a cheap nylon sleeve is a serious liability on the trail. Mass-produced sheaths rarely match the exact curves of a custom knife, and they often lack the durability needed for real outdoor work.
By taking the time to craft your own custom leather housing, you guarantee a flawless, glove-like fit. You get a sheath that holds the knife securely, protects the blade, and keeps you safe. Plus, there is nothing quite like the satisfaction of carrying a tool in a sheath you built with your own hands.
This guide will walk you through the process, step-by-step. We are going to cover everything from tracing your pattern to wet-molding the final fit. Whether you are outfitting a heavy hunting knife or a small utility blade, these steps will help you build a piece of gear that will last a lifetime.
Gathering Your Tools and Leather
Before you make a single cut, you need to set up your workbench. Using the right materials makes the job much easier and prevents frustrating mistakes. Here is what you need:
- Vegetable-Tanned Cowhide (7oz to 9oz): This is absolutely mandatory. You must use “veg-tan” leather. Do not use chrome-tanned leather (the soft stuff used for jackets and upholstery). Veg-tan uses natural tree bark tannins, which means it holds its shape when wet-molded and, crucially, won’t rust your knife blade over time like the chemicals in chrome-tanned leather will.
- Heavy Waxed Thread and Harness Needles: You want thick, braided polyester or linen thread (about 0.8mm to 1.0mm) and a couple of blunt-tipped harness needles.
- The Basic Toolkit: You will need a sharp utility knife (or X-Acto blade), a leather stitching groover, a stitching chisel (or an awl to punch holes), some contact cement, and a sponge.
The Step-by-Step Build Sequence
Phase 1: Making Your Paper Template
Never cut your leather until you have a perfect paper template. Place your knife flat on a piece of heavy paper or a manila folder. Trace the outline of the blade and handle. Now, flip the knife over along its spine and trace it again to create a fold-over “taco” style layout.
The Golden Rule: You must add a 1/2-inch border all the way around the cutting-edge side of your drawing. This extra space is mandatory to leave room for the stitching and the internal safety welt. Once your lines look good, cut the paper template out.
Phase 2: Cutting the Leather
Lay your paper template flat onto the smooth side of your veg-tanned hide. You can tape it down so it doesn’t shift. Trace the border carefully using a scratch awl or a pencil. Using your utility knife, make clean, firm cuts along your traced lines.
Next, you need to cut out the welt. Cut a separate 1/2-inch wide strip of leather that exactly matches the curve of the blade’s edge.
Phase 3: Installing the Safety Welt (Do Not Skip This!)
The internal leather welt is the most important part of learning how to make a leather knife sheath. Without a welt, your sharp blade will eventually slice right through your stitching from the inside out.
Apply a thin layer of contact cement to the inner edge of your main sheath panel and to both sides of your welt strip. Wait a few minutes for the glue to get tacky, then press the welt firmly into place along the edge where the blade will sit.
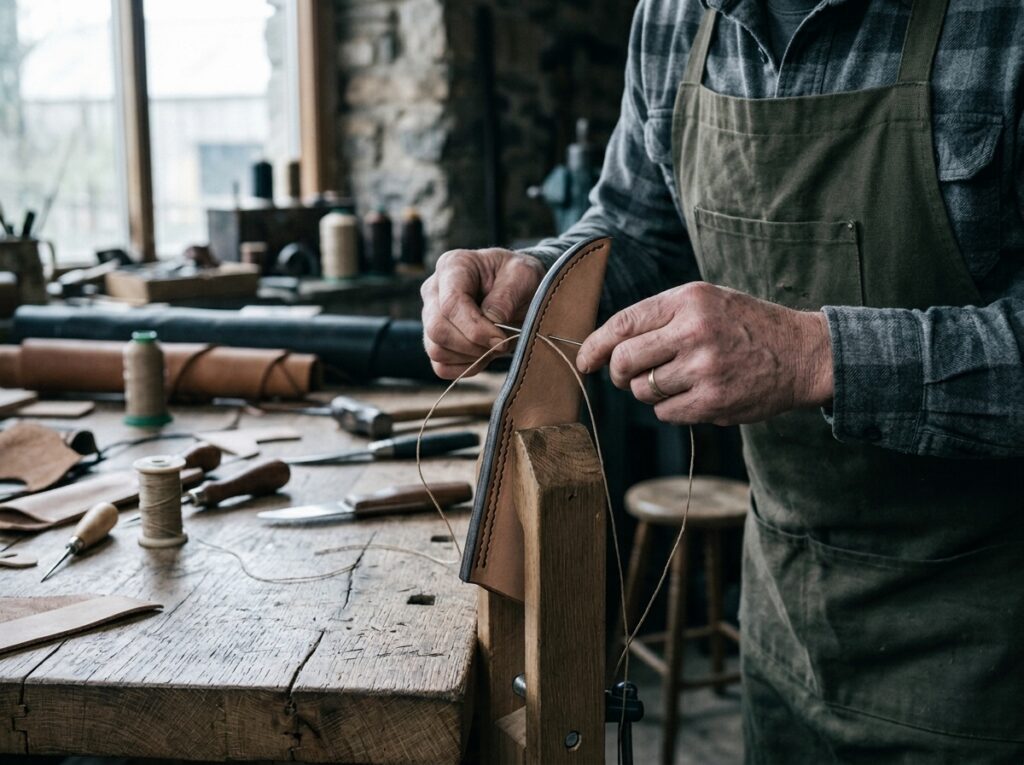
Phase 4: Punching and Saddle Stitching
Fold the sheath completely in half over the welt. Now you have three layers of leather sandwiched together at the edge. Use a groover or wing dividers to mark a line about 3/16-inch from the outside edge.
Use your stitching chisel and a mallet to punch holes all the way down that line through all three layers of leather. Finally, sew it up using traditional hand-sewn saddle stitching. This involves putting a needle on both ends of your waxed thread and passing them through each hole from opposite sides. This interlocking stitch ensures that even if you break one loop on a briar bush, the rest of the seam will stay tightly locked.
Phase 5: Wet-Molding for a Custom Fit
This is where the magic happens. To create that satisfying friction fit that locks the knife in place, you need to wet-mold the leather.
First, wrap your knife tightly in two or three layers of plastic kitchen wrap so it doesn’t get wet and rust. Next, run your finished leather sheath under warm water for about 30 seconds until the leather feels flexible.
Push the wrapped knife down into the damp sheath. Use your thumbs (or a smooth tool like a bone folder) to firmly press and massage the wet leather into all the curves of the knife’s handle and guard. Once you have it molded perfectly, set it aside in a warm room and let it dry completely (usually 12 to 24 hours).
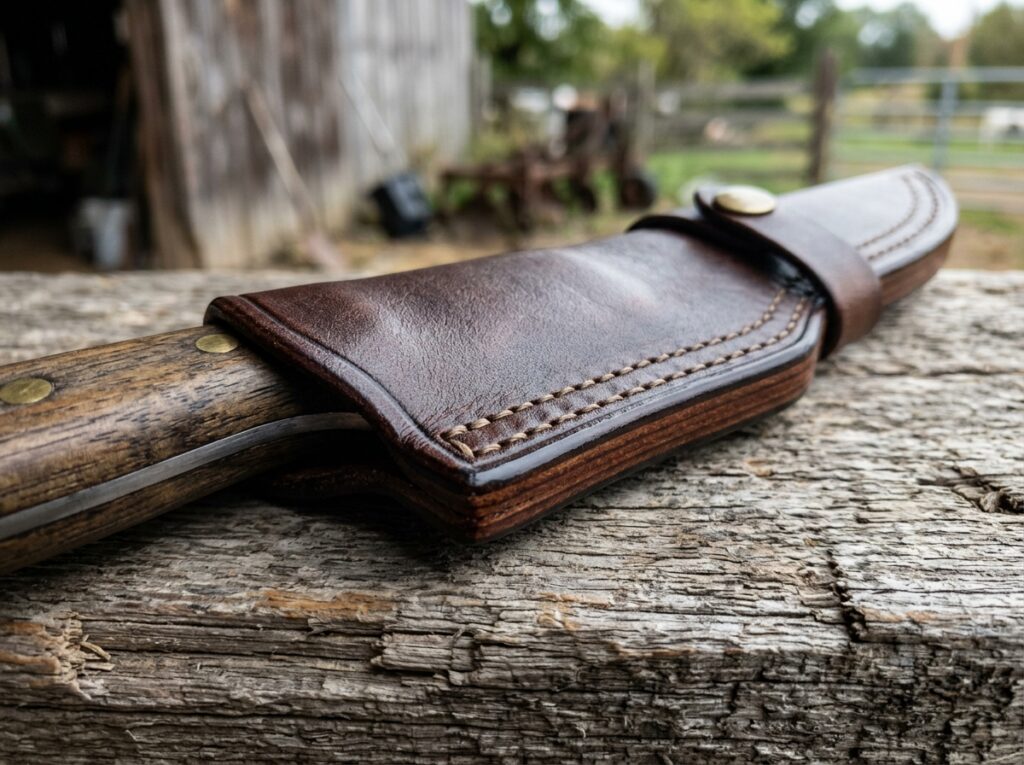
Finishing Touches for the Trail
Once your sheath is bone dry, pull the wrapped knife out. The leather will be rock hard and perfectly molded.
The raw edges of your sheath will probably look a little rough. You can use an edge beveler to take off the sharp square corners, then rub the edge briskly with a damp sponge or a wooden edge slicker until the fibers melt together into a smooth, professional-looking edge.
To finish it off, rub a light coat of natural beeswax balm or a specialized leather conditioner over the outside. This will protect the leather from rain and trail mud, ensuring your custom-built sheath is ready for a lifetime of hard work.